Published on
How to Create Your Own Free Minecraft Server with PaperMC: A Step-by-Step Guide
If you've ever thought about running your very own Minecraft server, now is the time to turn that dream into reality! With the increasing popularity of Minecraft, creating your own server can be a fun and rewarding experience, especially when you play with friends or build a community. In this post, we’ll guide you through the process of setting up a free self-hosted PaperMC Minecraft server, from start to finish. Let’s dive in!What is PaperMC?
PaperMC is a high-performance fork of the Spigot server that optimizes Minecraft’s gameplay and improves performance, making it the ideal choice for players looking for a stable and fast server. It also supports plugins, allowing for enhanced gameplay features.
Step-by-Step Guide to Create Your Own PaperMC Server
Step 1: Prepare Your System
Before you begin, ensure your computer meets the following requirements:
OS: Windows
Java: You need Java 21 or later. Check your version by typing java -version in your command line. If you don’t have it installed, download it from the AdoptOpenJDK or Oracle site.
Download the installer as below preview:
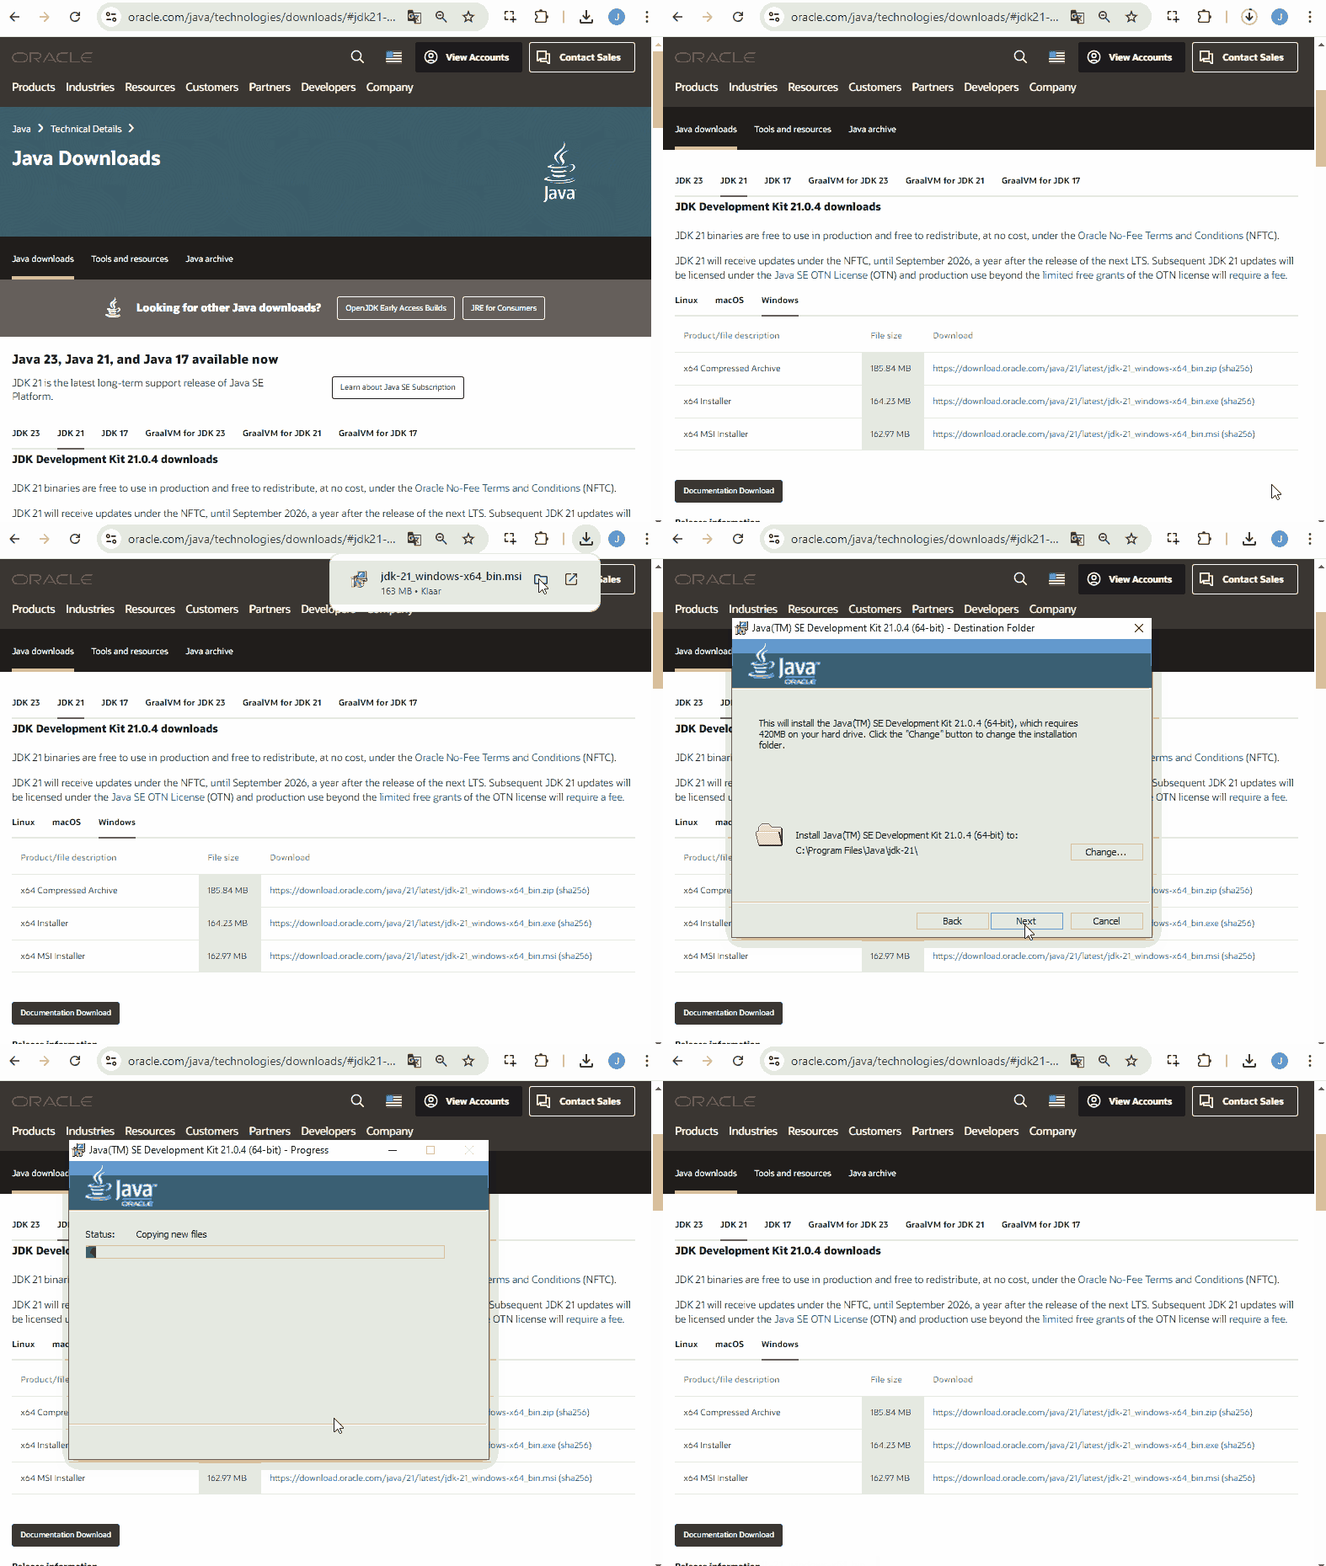
After downloaded you need to run the installer before continued.
RAM: At least 1 GB of RAM for a small server. More players will require more RAM.
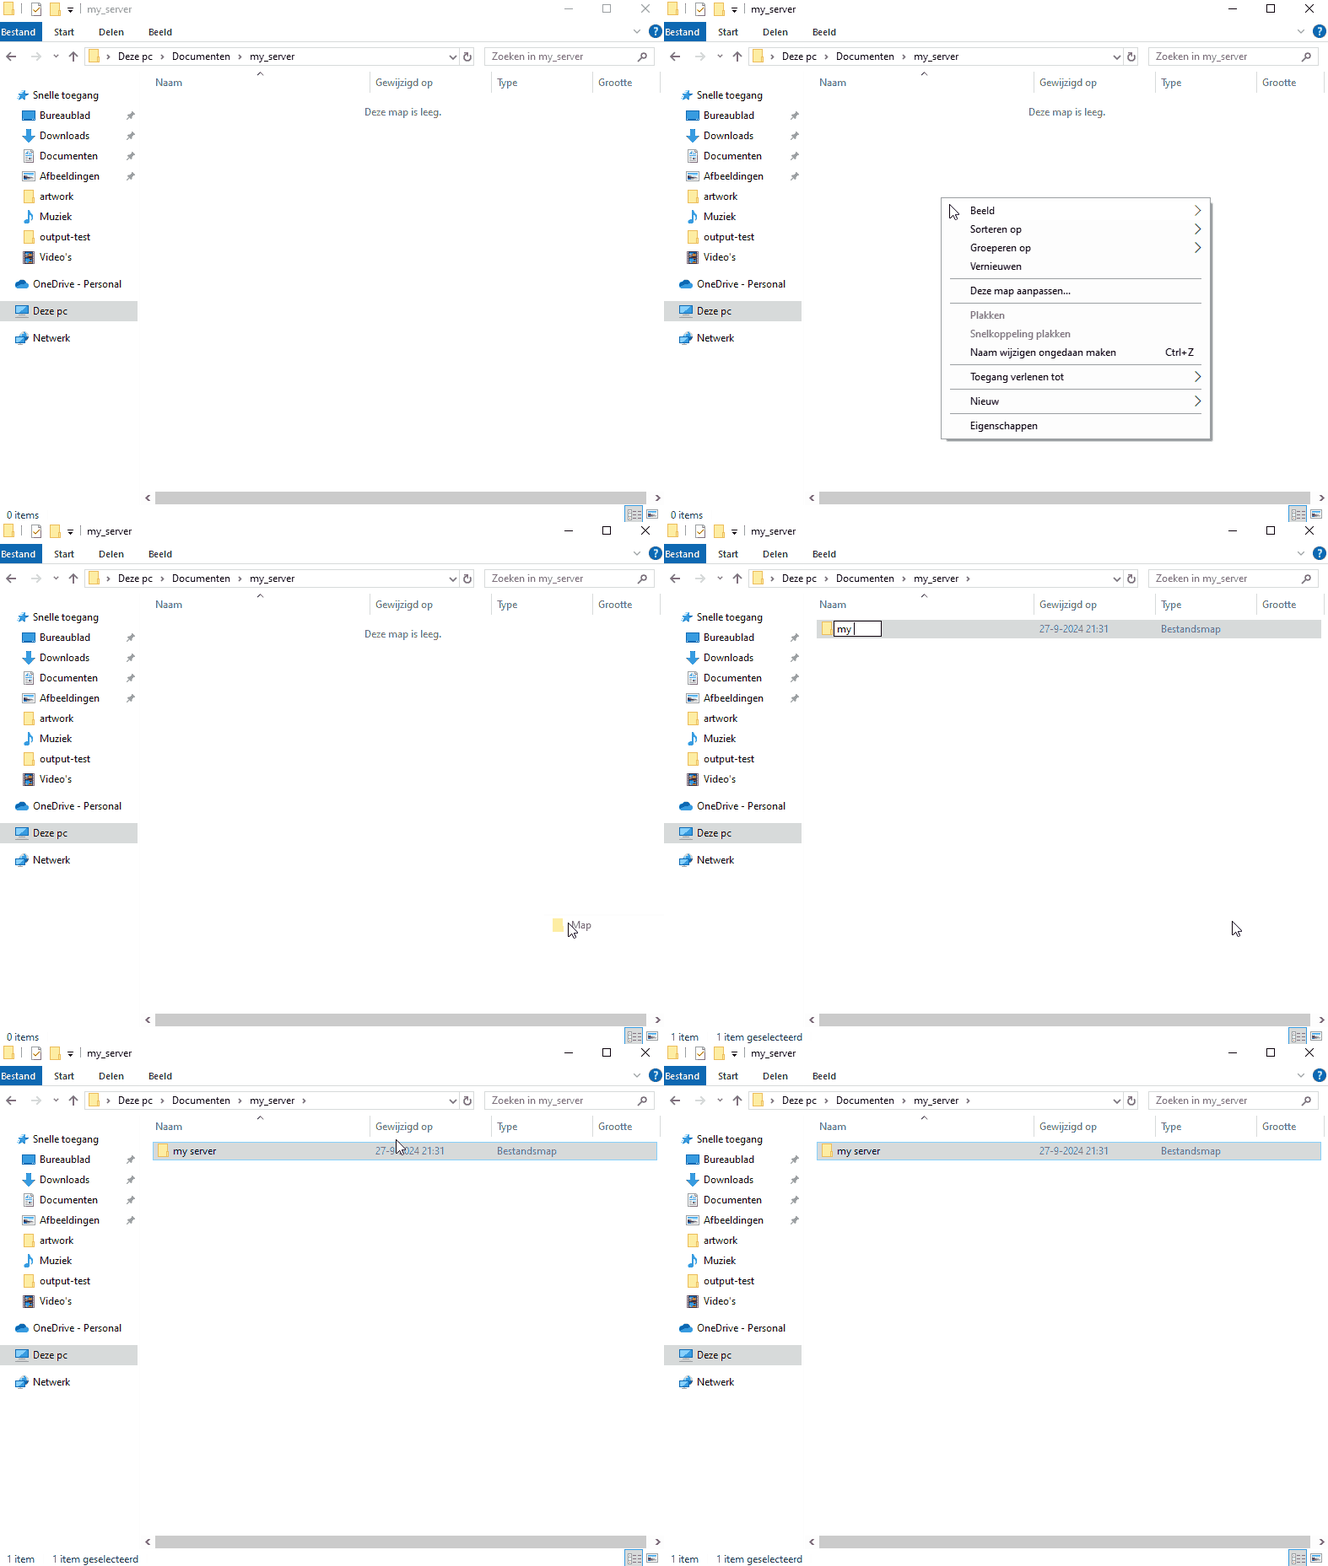
Step 2: Create a Folder for Your Server
Create a new folder on your desktop or in your documents named PaperMC Server.
Open this folder to keep everything organized.
Step 3: Download PaperMC
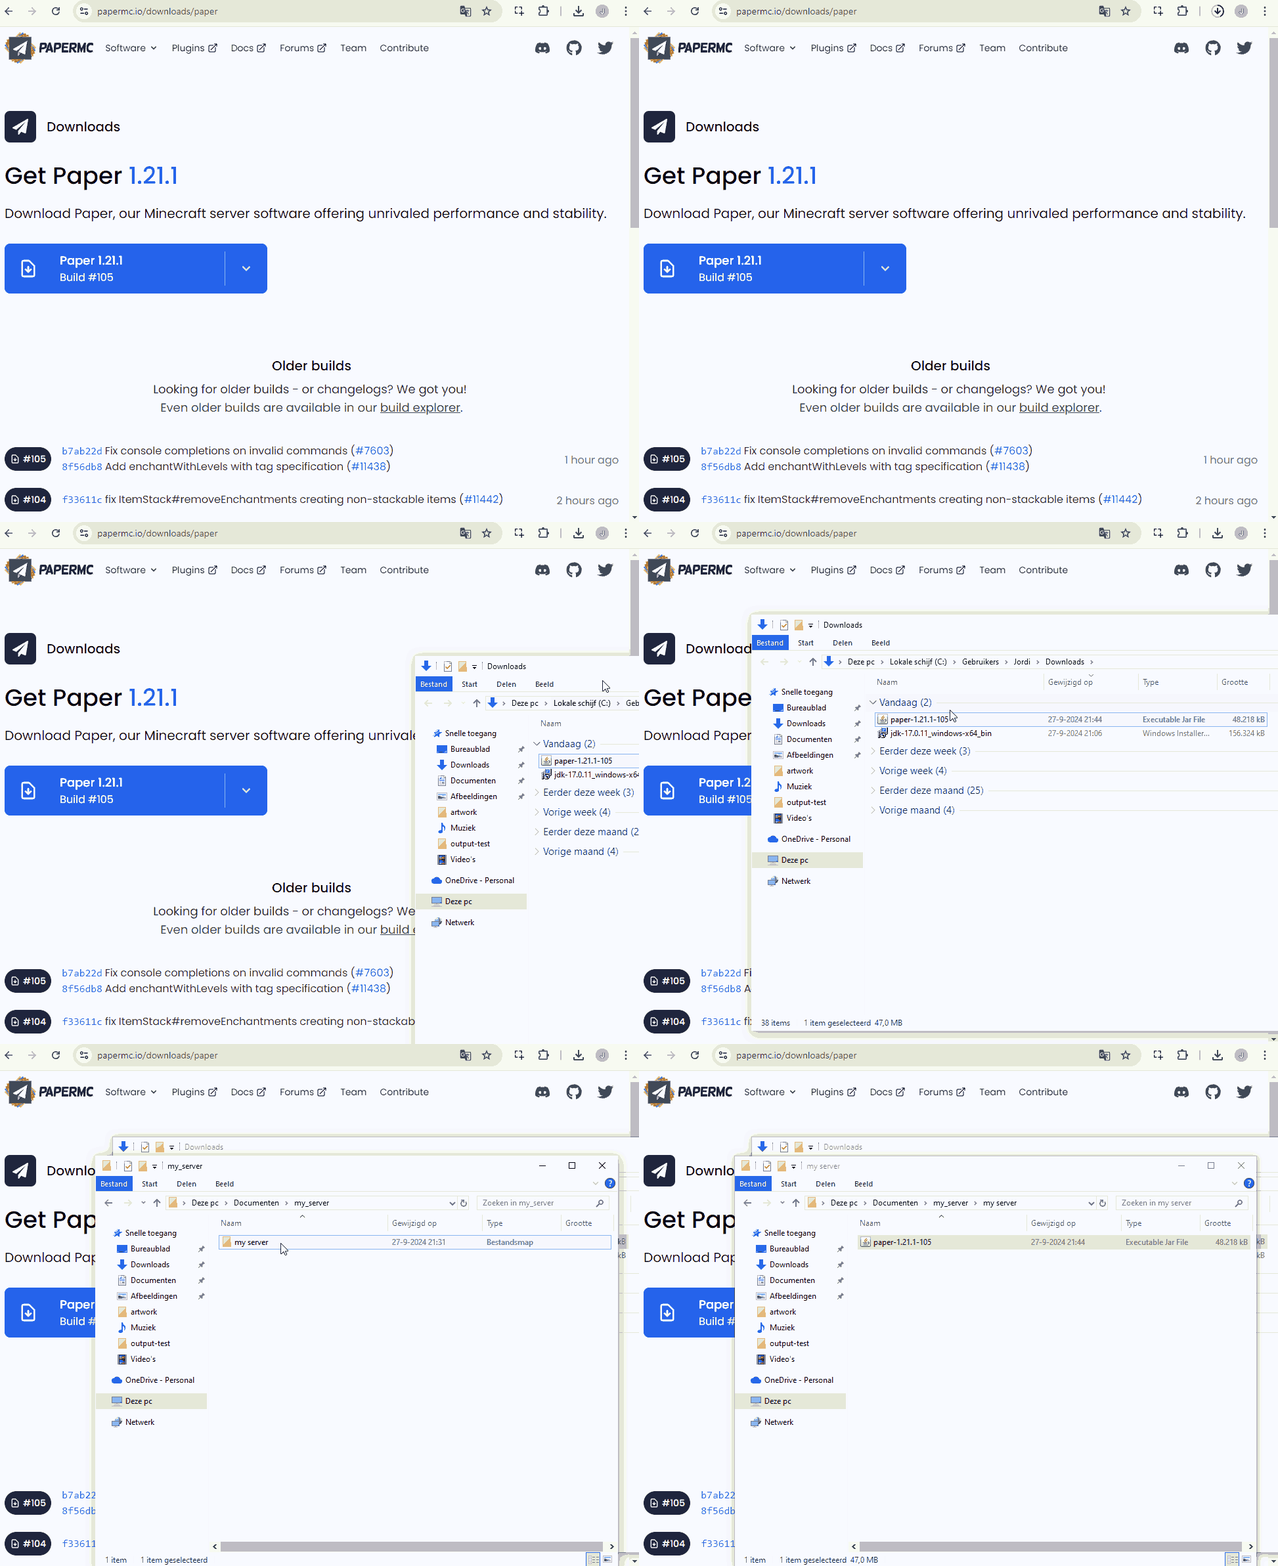
Visit the PaperMC downloads page.
Download the latest version of the PaperMC server jar file.
Place this jar file in your PaperMC Server folder.
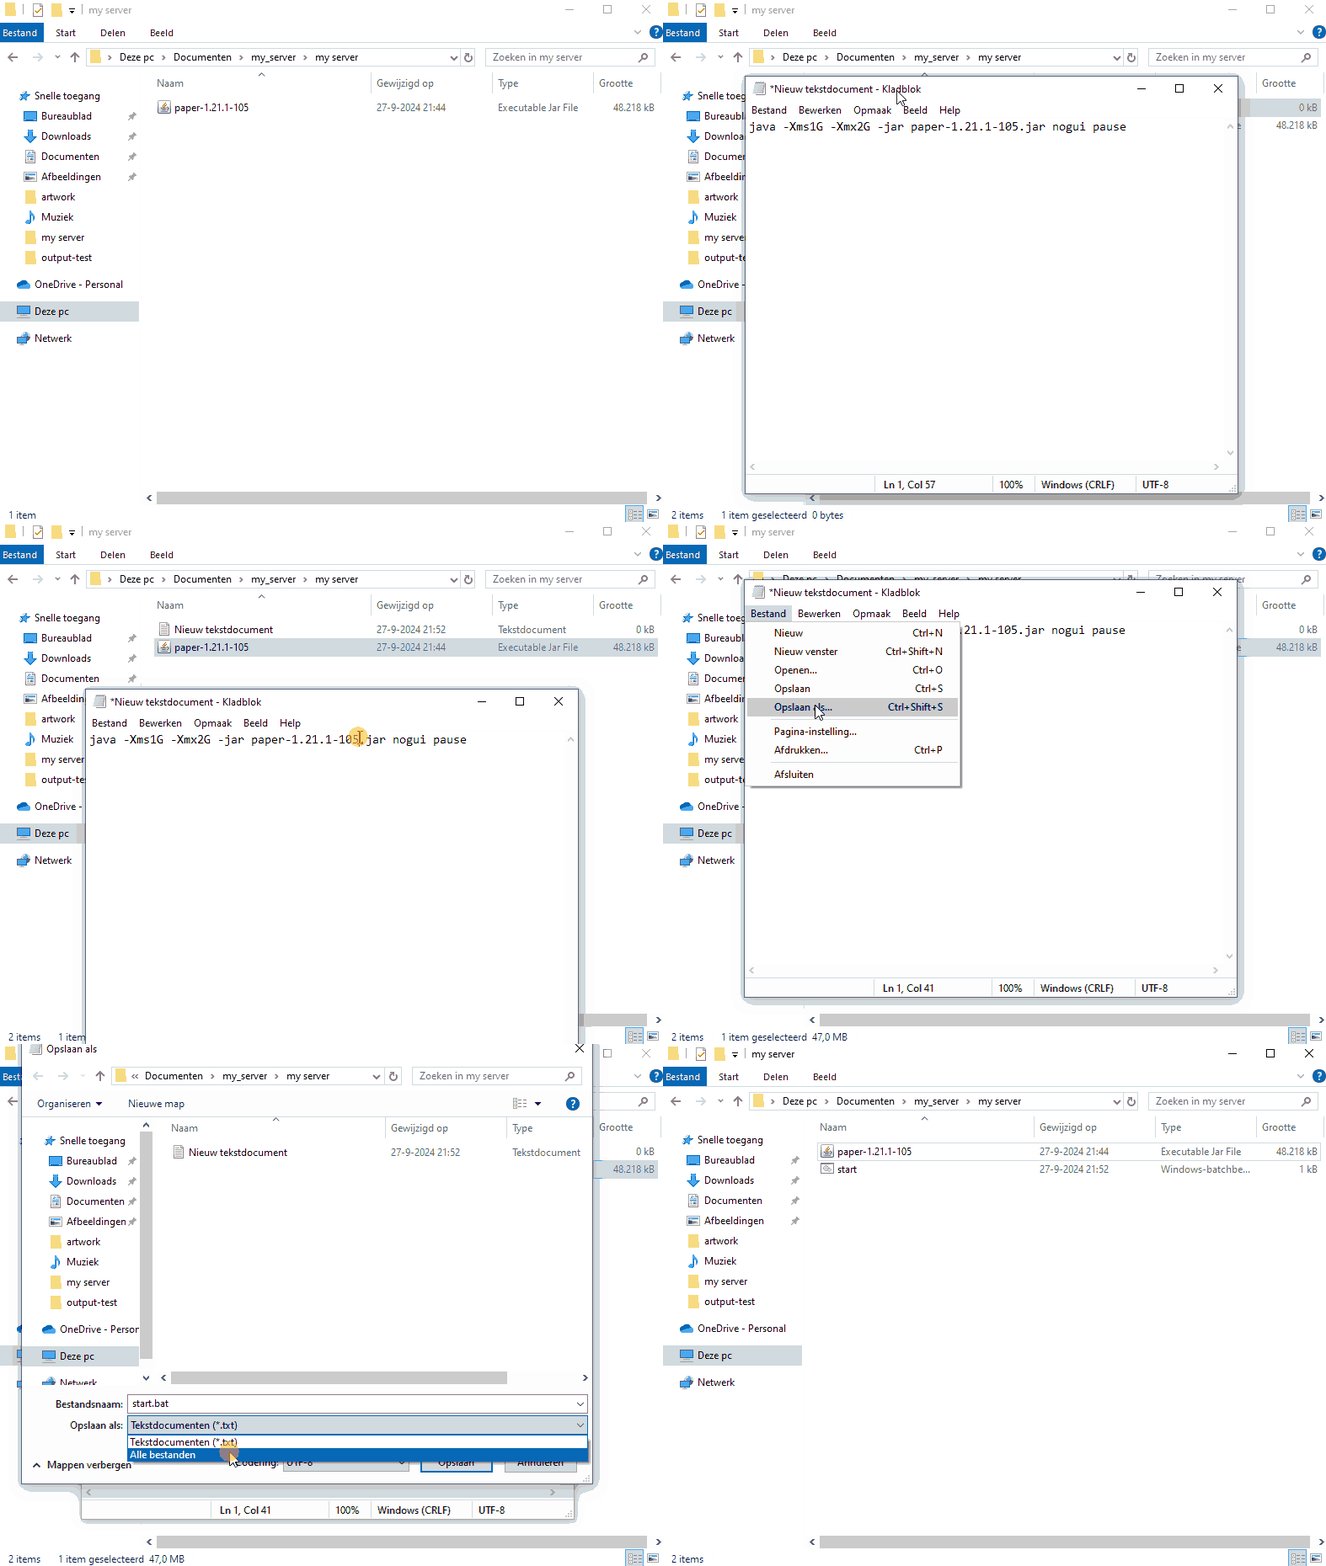
Step 4: Create the Start Script
To run your server, you’ll need to create a start script.
Create a new text document in your server folder.
Rename it to start.bat
Open the file and add the following lines:
java -Xms1G -Xmx2G -jar paper-1.19.2-123.jar nogui pause
Save and close the file.
Step 5: Run Your Server
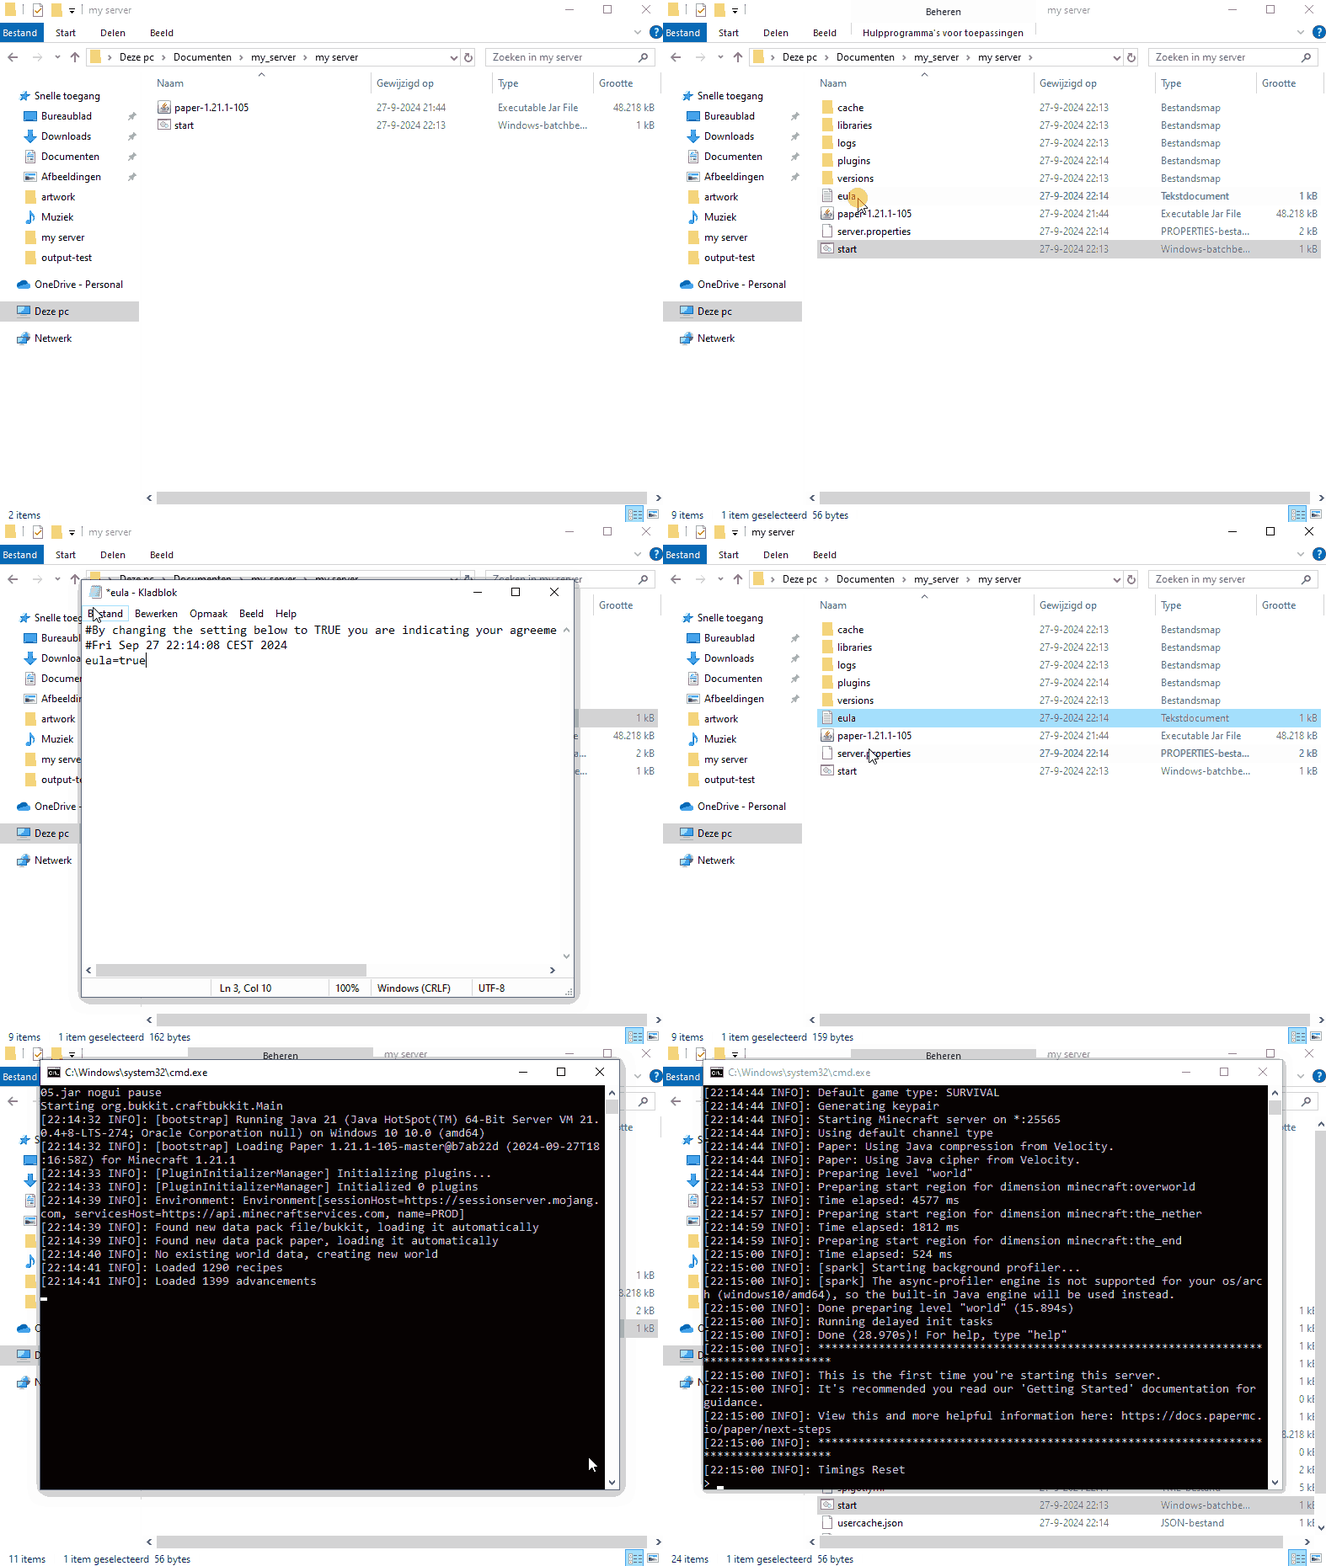
Double-click start.bat.
The server will generate some files and folders. You may need to accept the EULA by editing the eula.txt file and changing eula=false to eula=true.
Restart the server.
Step 6: Configure Your Server
Open the server.properties file in your server folder to customize settings like game mode, difficulty, and maximum players. Here are a few key settings you might want to adjust:
gamemode=survival (or creative, adventure)
difficulty=easy (or normal, hard)
max-players=20 (or whatever fits your community)
Step 7: Invite Friends to Join
To allow friends to join, share your public IP address (you can find it at whatismyip.com) and ensure the necessary port (default is 25565) is open on your router. You may need to configure port forwarding if your friends can't connect.
Step 8: Enhance Your Server with Plugins
With PaperMC, you can install various plugins to customize your server experience. Some popular plugins include:
EssentialsX: Adds essential commands like teleportation, home set, and more.
LuckPerms: A powerful permissions management plugin.
WorldEdit: For advanced building and editing features.
To install a plugin, simply download it from a trusted source like SpigotMC and place the jar file in the plugins folder in your server directory and restart your server.
Conclusion
Congratulations! You’ve officially created your very own PaperMC Minecraft server. No more dreaming—now it’s time to build, explore, and share with friends. Whether you want to create epic worlds, engage in survival challenges, or dive into creative building, your server is the perfect playground. So grab your pickaxe and start crafting your Minecraft adventure today! Happy gaming!